Step-by-Step Guide: Installing Ghost on Your Local Computer
We are here to help you install Ghost on your local server! Whether you're a passionate blogger, an aspiring writer, or a web developer looking to create a powerful publishing platform
We are here to help you install Ghost on your local server! Whether you're a passionate blogger, an aspiring writer, or a web developer looking to create a powerful publishing platform, Ghost offers a robust and user-friendly solution. By installing Ghost on your local host, you can experiment, customize, and perfect your blog before taking it live on the internet.
In this step-by-step Ghost installation guide, we'll walk you through the process of installing Ghost on your local host. You will have a secure and private environment where you can test new themes, experiment with ghost integration, and fine-tune your blog's settings to match your vision.
Whether you're a beginner or have some experience with web development, our guide is crafted to be accessible to everyone, providing clear instructions and explanations along the way. So, let's dive in and get you started on the path to a fully functional Ghost installation for local testing!
Overview of the blog, You will Learn from this Blog:
- What is a ghost?
- Why install Ghost on your local host?
- Prerequisites for Ghost Installing
- Step by Step Guide for Installing Ghost
- Summary of the post.
- FAQs
What is a ghost?
Ghost is a lightweight, popular, and modern content management system (CMS). It is built on modern Node.js technology. Ghost is an open-source platform that allows users to create and manage their content intuitively. It is designed specifically for bloggers, publishers, journalists, content creators, and developers. It is an elegant, minimalistic interface that puts your content front and center, allowing you to focus on what matters most creating exceptional blog posts.
Why install Ghost on your local host?
Installing Ghost on your local host offers many benefits. Firstly, it provides a secure and controlled environment for website development and testing, ensuring that your content remains private until it is ready for publication. Secondly, it enables you to experiment with custom themes, third-party plugin integration, and configurations without impacting your live website. Thirdly, it facilitates offline content creation, allowing you to work on your blog or website even without an internet connection. Lastly, it fosters a faster and more efficient workflow, as you can quickly iterate and make changes locally before deploying them to a live server. Now, in this local Ghost installation tutorial, I will tell you the easy way to install Ghost locally.
Prerequisites for Installing Ghost on Your Local Computer
To install Ghost locally, you will need the following:
- A computer running macOS, Windows, or Linux
- A supported version of Node.js
- Either yarn or npm to manage packages
- A clean, empty directory on your machine
Here is a more detailed, quick, and easy Ghost installation guide for running Ghost on your local machine. Let’s now see how to install Ghost on localhost.
Step-by-Step Guide
Step 1: Set Up Your Local Development Environment
Setting up a local development environment typically involves installing the necessary tools and software dependencies to support your development workflow. Here's a general guide to help you get started with Ghost's local environment setup:
- Choose an Operating System: Decide on the operating system you prefer to use for development. Popular options include Windows, macOS, or Linux distributions like Ubuntu.
- Install a Text Editor: Select a text editor that suits your programming language and personal preference. Some popular choices include Visual Studio Code, Sublime Text, and Atom.
- Terminal or Command Prompt: You will need to use the terminal or command prompt to execute commands for installing Ghost.
Step 2: Check System Requirements
Make sure you have Node.js installed. If you have not installed Node.js on your computer, you can download it from the official Node.js website and install the latest stable version.
Step 3: Install Ghost-CLI
Now we have to install Ghost-CLI. Ghost CLI provides you with just about all the features you need to maintain, install, and configure Ghost installations.
- Open a command prompt or terminal window on your computer.
- Run the following command and press Enter.
npm install ghost-cli@latest -g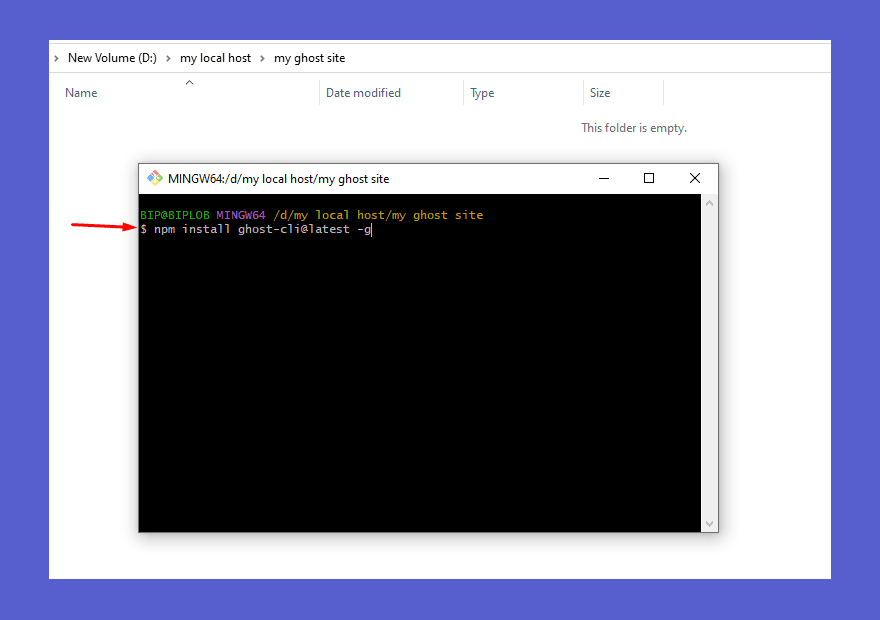
Step 4: Create a new directory for Ghost
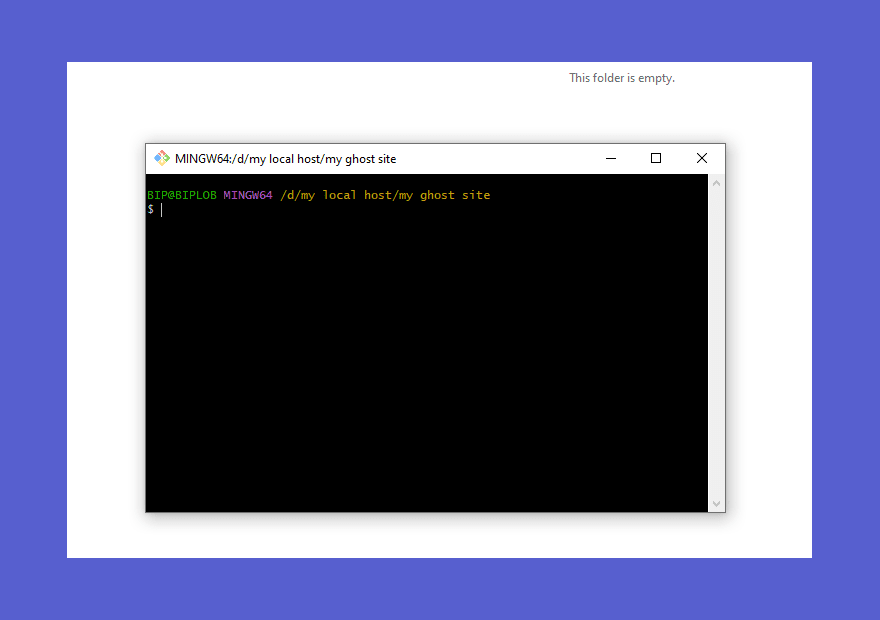
Now create a new folder on your computer give it a name and open the command prompt or terminal on the folder

- Open the command prompt or terminal on the folder.
Step 5: Install Ghost
In this step, we will be going to install Ghost on the local host.
- With the command prompt or terminal still open and located in your chosen directory, run the following command.
ghost install localBefore using this command make sure you have to install ghost CLI on your computer.
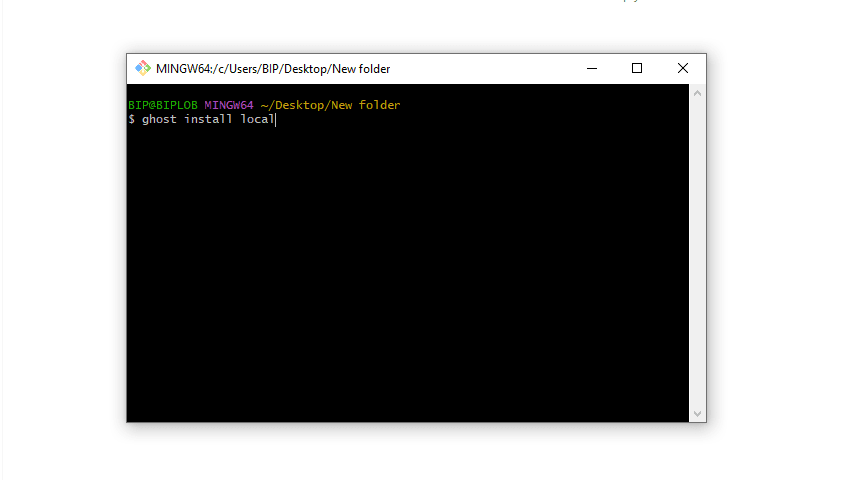
- Ghost installation has begun. Please wait a minute to complete the installation process.
Step 6: Start Ghost
- Once the installation is complete, start Ghost by running the following command.
ghost start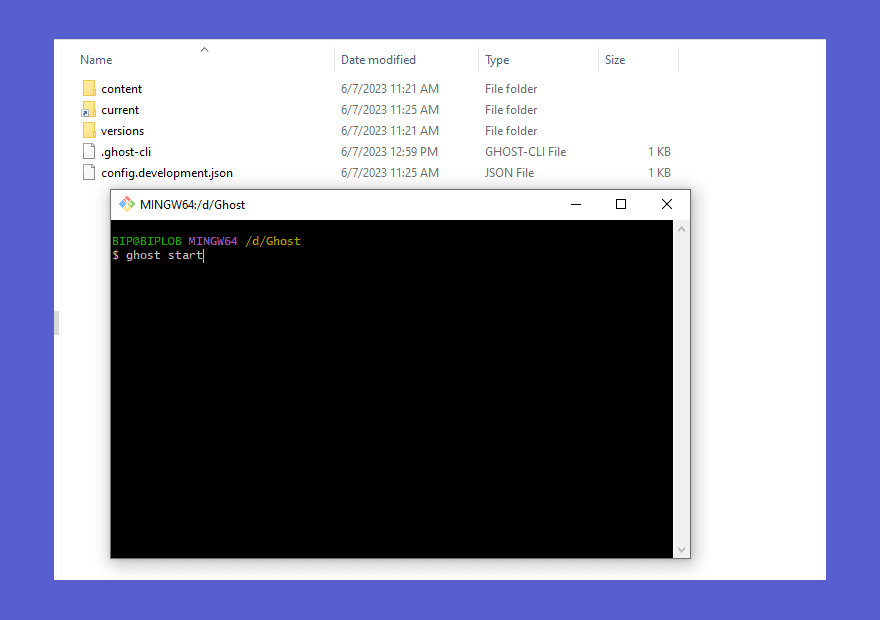
- Ghost will start running on your local host using the default port 2368.
Step 7: Access Ghost in your browser
- Open your web browser (such as Chrome, Firefox, or Safari).
- Copy this URL and paste it into your browser to open your ghost website.
http://localhost:2368 - You should see the Ghost setup page, where you can create your admin account and configure your site.
- Fill out all the details to create a new account for publishing your content.
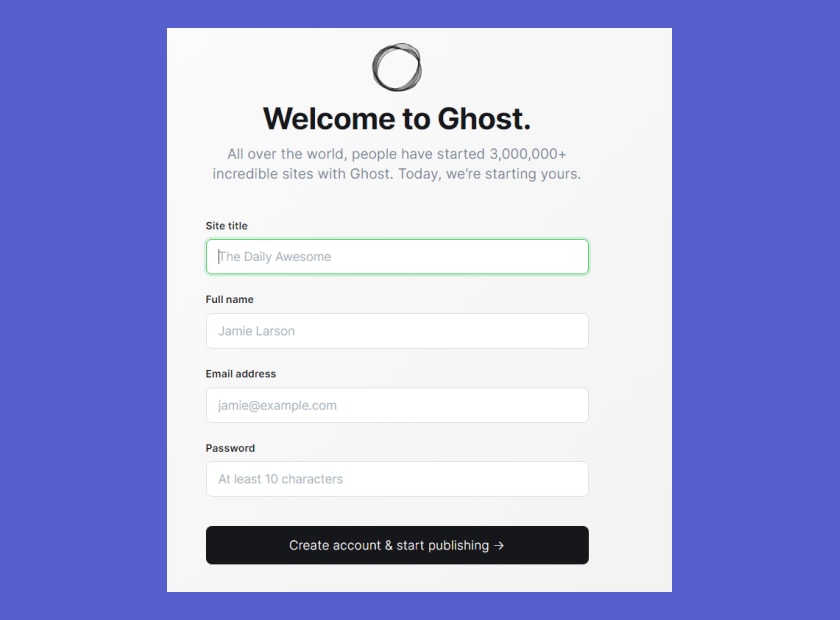
Congratulations! You have now successfully installed Ghost on your local host. You can begin customizing your Ghost site, publishing content, and exploring its various features.
FAQs
Do you have any questions about installing Ghost on your local computer? We have answers to some frequently asked questions on the topic.
What are the system requirements for installing Ghost on a local computer?
To install Ghost on your local computer, you need the following system requirements:
- Operating System: Windows, macOS, or Linux.
- Node.js: Install the latest version of Node.js (LTS recommended) on your computer.
- Database: Ghost supports SQLite by default, but you can also use MySQL or PostgreSQL.
- Storage: Ensure you have enough disk space available for your content and media files.
- Web Browser: Use a modern web browser like Chrome, Firefox, or Safari to access the Ghost admin interface.
By meeting these requirements, you'll be ready to install and run Ghost on your local computer.
Can I customize the design and layout of my Ghost site?
Yes, Ghost provides an easy and powerful dashboard that allows you to customize the design and layout of your site. You can create your own themes from scratch or choose from a wide range of pre-built themes available in the Ghost marketplace.
Can I migrate my locally installed Ghost instance to a live server or hosting environment?
Yes, you can migrate your locally installed Ghost instance to a live server or hosting environment. Export your local Ghost content, set up Ghost on the live server, import the exported content, configure settings, and themes, and test and verify the launch of your live Ghost instance.
How can I update the Ghost version on my local computer to the latest release?
To update Ghost to the latest release on your local computer, use Ghost-CLI. Backup your data, check the current version, navigate to your Ghost installation directory in the command line, and run ghost update. Follow the prompts to complete the update. Verify the update by checking the version using ghost --version.
Is it possible to migrate my existing WordPress site to Ghost?
Yes, you can migrate your content from WordPress to Ghost using the various tools and plugins available. Ghost provides official migration tools to help you seamlessly transition from WordPress to Ghost.
Final Thought
In conclusion, you've successfully completed the installation of Ghost on your local host, opening up a world of possibilities for your ghost journey. With its user-friendly interface and content-focused design, Ghost is an ideal platform for bloggers, content creators, and publishers. Take advantage of experimenting with your website in a private environment. Ghost has extensive features and customization options to create a captivating website. You can ensure it aligns with your unique vision and captivates your audience. Enjoy the journey with Ghost CMS on your local host!
